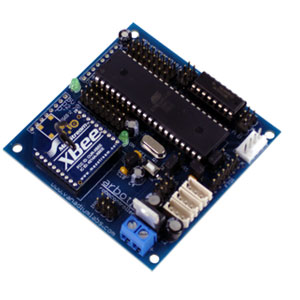
A number of the stock Arduino libraries will work on the ArbotiX, but there are also a couple of specific ones to use the on-board
hardware:
The default Serial library that comes with Arduino environment will work with either the FTDI cable or the XBEE radio
on the ArbotiX (remember, don't connect both the FTDI and the XBEE at the same time). We suggest using 38400 as the baud rate,
since all of our demos use that.
The BioloidController library is an easy way to interact with Bioloid servos. It consists of several files:
- ax12.h & ax12.cpp - implement the low-level serial communications code for communicating with the Bioloid bus.
- BioloidController.h & BioloidController.cpp - implement higher level functions, like loading a pose from
FLASH memory, or manipulating poses.
BioloidController: Getting Started
AX-12 servos are different from regular hobby servos. They connect to a serial bus, and each has an ID number.
Rather than receiving a PWM signal, we write to onboard memory locations through our serial protocol. For more
information about AX-12 servos please see the documentation from Robotis.
The lowest-level of the BioloidController library is composed of simple functions to read/write register
locations on the AX-12. We have also provided a number of special definitions to make the most common operations
a simple function call:
// need to include header files, you can do this in the Arduino IDE, by selecting Sketch|Import Library|Bioloid.
#include <ax12.h>
#include <BioloidController.h>

// we always need to create an instance of the bioloid control, usually with baud = 1Mbps.
BioloidController bioloid = BioloidController(1000000);

int i;
void setup(){
    i = 0;
}

void loop(){
    // set AX-12 servo with ID=1, to position i, where 0=<i<1024
    SetPosition(1,i);
    i = (i++)%1024;
}
Helper function macros include:
- SetPosition(servo_id, position) - set the position of a servo.
- TorqueOn(servo_id) - turns on the torque
- Relax(servo_id) - turns off the torque, allows hand-posing the servos.
However, you can access the full set of registers using:
- ax12GetRegister(servo_id, regstart, length) - read a register value back, length should currently
be either 1 or 2, regstart should be the name/memory location of the register. All these definitions are
included in ax12.h, such as AX_GOAL_POSITION_L.
- ax12SetRegister(servo_id, regstart, data) - write the value of a single register within a servo. As above,
regstart should be the name/memory location of the register, data is the byte to be written.
- ax12SetRegister2(servo_id, regstart, data) - write the value of a 2-byte register.
BioloidController: Using Poses
Manipulating individual servos is nice, but when we have multi-servo legged robots, it can
be slow and repetitive. A common solution is to use poses and to play the poses out to have
the robot walk. If we have gathered our poses using PyPose, we will have exported a pose file that looks like:
#ifndef DROID_POSES
#define DROID_POSES

#include <avr/pgmspace.h>

PROGMEM prog_uint16_t liftLeft[] = {4, 612, 620, 450, 380};
PROGMEM prog_uint16_t plantRight[] = {4, 612, 620, 508, 516};
PROGMEM prog_uint16_t swingRight[] = {4, 612, 620, 710, 593};
PROGMEM prog_uint16_t swingLeft[] = {4, 413, 410, 450, 390};
PROGMEM prog_uint16_t plantLeft[] = {4, 418, 411, 503, 516};
PROGMEM prog_uint16_t liftRight[] = {4, 523, 520, 712, 592};

PROGMEM transition_t forward[] = {{0,7} ,{plantLeft,250} , ...

#endif
Where droid was the name of our robot (PyPose automatically converts it to upper case during export),
and liftLeft, plantRight, etc are the pose names. We will typically save our pose file as poses.h, in the
directory where our sketch is located. This pose file is the example from our video of making the walking droid work
with an ArbotiX. We'll discuss the transition sequence (forward) later.
We can now load these poses from FLASH memory, and send them out to the servos using a bioloid-bus SyncWrite
(which is much faster than setting the position of each servo individually).
BioloidController: Interpolation Engine
An important consideration is how fast should we move from one pose to another? If we move to fast,
a walking robot will likely topple over. AX-12 servos are too fast to let them go directly to the new
position, so if we want a gradual change, we will need to interpolate between our current pose and our
next pose. The BioloidController library allows this to be done very easily:
#include <ax12.h>
#include <BioloidController.h>
#include "poses.h"  // pose file generated from PyPose

BioloidController bioloid = BioloidController(1000000);

#define frames 6
int idx = 0;

// stand up slowly
void setup(){
    delay(100);                    // recommended pause
    bioloid.loadPose(plantLeft);   // load the pose from FLASH, into the nextPose buffer
    bioloid.readPose();            // read in current servo positions to the curPose buffer
    bioloid.interpolateSetup(500); // setup for interpolation from current->next over 1/2 a second
    while(bioloid.interpolating > 0){  // do this while we have not reached our new pose
        bioloid.interpolateStep();     // move servos, if necessary.
        delay(3);
    }
}

void loop(){}
The interpolation engine is very simple. It writes a new frame out to the servos at about 30Hz. If your
loop code gets really long, this could become problematic. Eventually, we will have an interpolation
engine that is interrupt driven, so that the movement is more guaranteed to be smooth.
An item I did not discuss above, was bioloid.readPose(), this queries each servo, and loads their
positions into the curpose buffer. This is most useful for standing up gently, as shown above.
bioloid.loadPose("pose_name") always loads into the nextpose buffer, and interpolation always
happens from curpose to nextpose. Note that is recommended to have a delay of at least 100ms after
startup before a readPose(), otherwise the AX-12s may not be ready and legs may jitter.
BioloidController: Walking with Sequences
We could manually handle loading pose after pose and writing them out to the servos, or we can use a
sequence. A sequence can be constructed in PyPose and is exported inside our pose file. Each sequence
contains several transitions, each transition is a pose name and an interpolation time to use when
transitioning to that pose.
#include <ax12.h>
#include <BioloidController.h>
#include "poses.h"

BioloidController bioloid = BioloidController(1000000);

void setup(){
    // stand up slowly
    delay(100);                    // recommended pause
    bioloid.loadPose(plantLeft);
    bioloid.readPose();
    bioloid.interpolateSetup(500);
    while(bioloid.interpolating > 0){
        bioloid.interpolateStep();
        delay(3);
    }

    // start our walking
    bioloid.playSeq(forward);
}

void loop(){
    bioloid.play();
}
We're using the same code to "stand" up, but then we call playSeq() with the name of a sequence, in our case,
forward which will make the robot walk forward. playSeq() is somewhat like interpolateSetup(), it just bootstraps
our system. We need to call play() just as we called interpolateStep(). Just like bioloid.interpolating, we have a
variable that tells us when we're done, bioloid.playing.
This library implements a dual motor driver using Timer2, it can be used to control the onboard motor driver on the ArbotiX.
It has several functions:
Motor speeds are between -255 and 255. -255 is full reverse, 0 is stopped, and 255 is full speed forward.
The EncodersAB library will decode 2 pairs of quadrature signals using a set of interrupts. The library
works with either the ArbotiX or the MINI. There is no need to create an instance of the library, it is
automatically created by the system, named Encoders. The left & right count are long integers, but they
could overrun if not read and cleared often enough.
Note that on the ArbotiX, the interrupt handlers are on a multiplexed channel, and thus are somewhat long
-- maximum count frequency is therefore limited.
The HServo library is basically a repackaged version of the old hardware-only Servo library. If your ArbotiX is
heavily loaded, you may find that the new software-extended Serial library causes glitches. This library will
allow you to control servos without glitches -- however it is limited to only 2 servos, instead of the 12 that
the new Servo library can do. The interface is the same as the Servo library, but can only be used on pins 12 and 13.
This library allows easy usage of a number of Sharp IR ranging sensors. Each IR ranger uses on analog pin.
The library function getData() converts the analog voltage into a distance in centimeters. The library
function getSmoothData() takes multiple readings from the analog port and may yield better results when
the sensor power supply is noisy.
When creating a our SharpIR object, we need to pass both the type of sensor connected, and which analog
pin it is connected to. The analog pins are numbered 0-7. The valid types are:
It is important to select the correct sensors type, or the conversion will be incorrect and you will
receive incorrect and useless range data.